Upload W-2 data file to Arizona
Registration is Required: You will need to have username and account with AZ Web File.
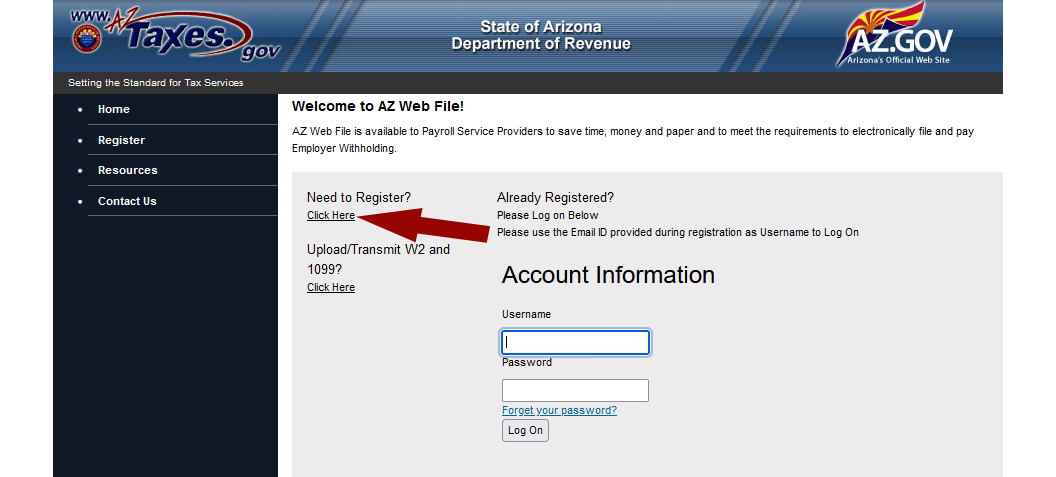
- To Create a Username
- Click here to access AZ Web File https://efile.aztaxes.gov/AZFSETPortal/
- Click on the “Click Here” under "Need to Register?" on the left side
- Complete the Registration information
- Under Terms of Service click to accept
- Click the [Register] button on the bottom left
- You will recieve an email with a Signature Card which must be signed and mailed back to the
Arizona Department of Revenue - Enter and verify all W2 data
- Enter the Submitter Information
- Click E-file Direct > Submitter Information
- Submitter information is person uploading the file
- Contact information is the Firm information preparing the W-2s
- Create the data file to upload
- Click E-file Direct > Create W-2 Files > Create State file and select Arizona
- Select a submitter
- Upload file information is the name and location of the file being created. You will need this information during the upload process.
- Click the [Create File] button to create the upload file.
- Upload the data file
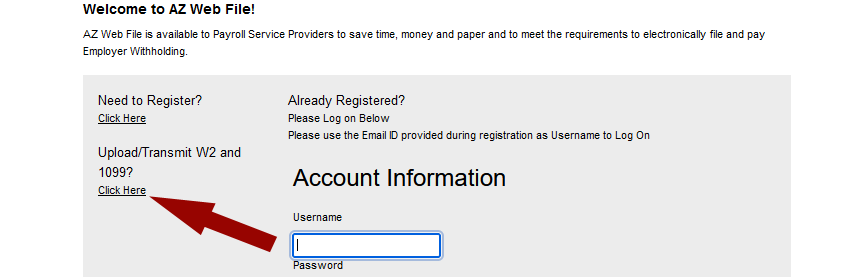
- Click here to access AZ Web File https://efile.aztaxes.gov/AZFSETPortal/
- Click on Click Here under "Upload/Transmit W2 and 1099?" on the left side
- Login to AZ Web File with a current AZ Web File (AZFSET) Web Upload email address and password.
- On the Welcome to Web Upload screen, click the [Continue] button.
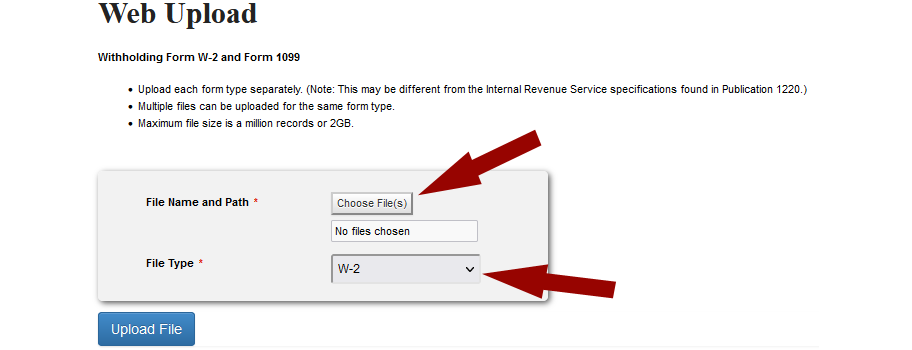
- On the Web Upload screen, select the file type from the drop down list.
- Click the Choose File(s) button to open the File Upload screen
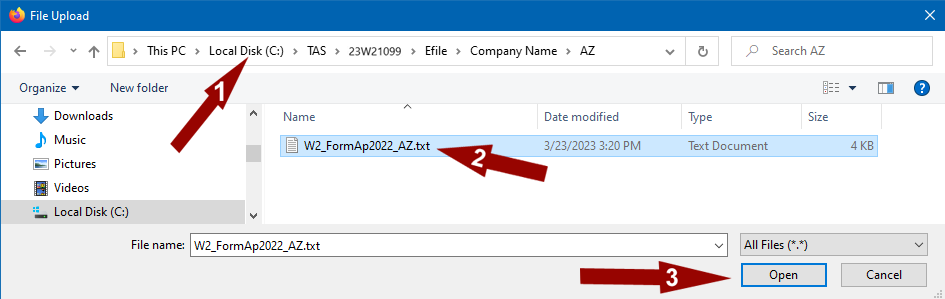
- Use the File Upload screen to browse and locate the file created with the W2/1099 Filer
- 1. Select file location - By default the files created will be in C:\TAS\23W21099\Efile\CompanyName\AZ
- 2. Select the file
- 3. Click [Open] button to close the window
- Click the [Upload File] button on the Web Upload screen.
- Check the Status of uploaded files
- On the “Web Upload” screen click select “E-File Status” from the “E-Filed Documents” menu to view the file status screen.
- Each uploaded file will be displayed along with its corresponding status; continue to check back until the status reflects “Completed.”